|
The CZ 457 triggerThe first thing you notice is that it looks like nothing you've ever seen before on a CZ rimfire rifle. Although fully adjustable it could have made with better adjustments in mind, however, we'll do our best to make due with what we go.
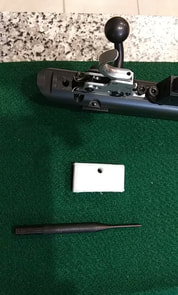
So in the kit you found a spring, and a nylon block with a hole in it. The punch shown in the picture is not included in the kit but is available on the website. What is that block for? well the block is to support the trigger assembly while you remove the pivot pin, which when aligned properly will drop down into that hole in the block. |
|
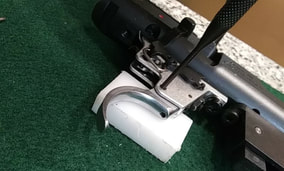
Remove the bolt from the action and then remove the trigger pull adjustment bolt and nut, nothing needs to be done to the other 2 adjustment screws. Slide the support block under the trigger assembly to support it during pivot pin removal. The pivot pin is in there pretty firm, it takes a good solid square hit on the punch to get it started, from there it starts to move fairly easy, ensure that the hold in the block is lined up with the pin so that it will slide out of the trigger while the block still supports the trigger assembly.
|

|
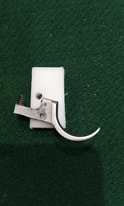
Once the pin has been removed and the punch removed you will feel the trigger push forward in the assembly from the spring tension, carefully move the trigger blade to the back of the housing and guide it out, the factory spring is held in place with a small dab of white grease, after removing the factory spring from the pocket in the trigger blade I recommend adding a little bit more grease to hold the new spring in place during reassembly. carefully slide the trigger blade back into the trigger housing being careful that the spring does not fall out of it's hole, use a small punch or tooth pick to guide the spring into place through the hole the adjustment bolt threads into while at the same time lining the hole for the pivot pin in the trigger blade with the hole in the assembly, once it's where it needs to be, reinsert the pivot pin. Ensure the spring is aligned with the hole for the adjusting bolt and reinsert the adjustment bolt with lock nut, from here you can adjust the trigger as per the included instructions in the owners manual with a much broader range of adjustment, especially on the lighter side.
|
|
|
|